Favourite Photos...

Favourite Photos...
Reading Lines GP35 #3647

Middletown, Pa

Tuesday 28 March 2017

Rutherford West - Interlocking Signal Bridge Operating...

So today I completed the wiring and programming of the Rutherford West - Interlocking Signal Bridge.

The process is fairly simple to get these wired to the Digitrax SE8C's.  The connection between the signal heads and the SE8C is made via a Digitrax TSMK (Terminal Strip Mounting Kit) and a 10 pair printer ribbon cable.

The TSMK makes hooking up the physical LED wires easy, and they also include inbuilt resistors too.  Two (2) TSMK's are required for one triple head mast, and a single TSMK for a double head mast/dwarf.

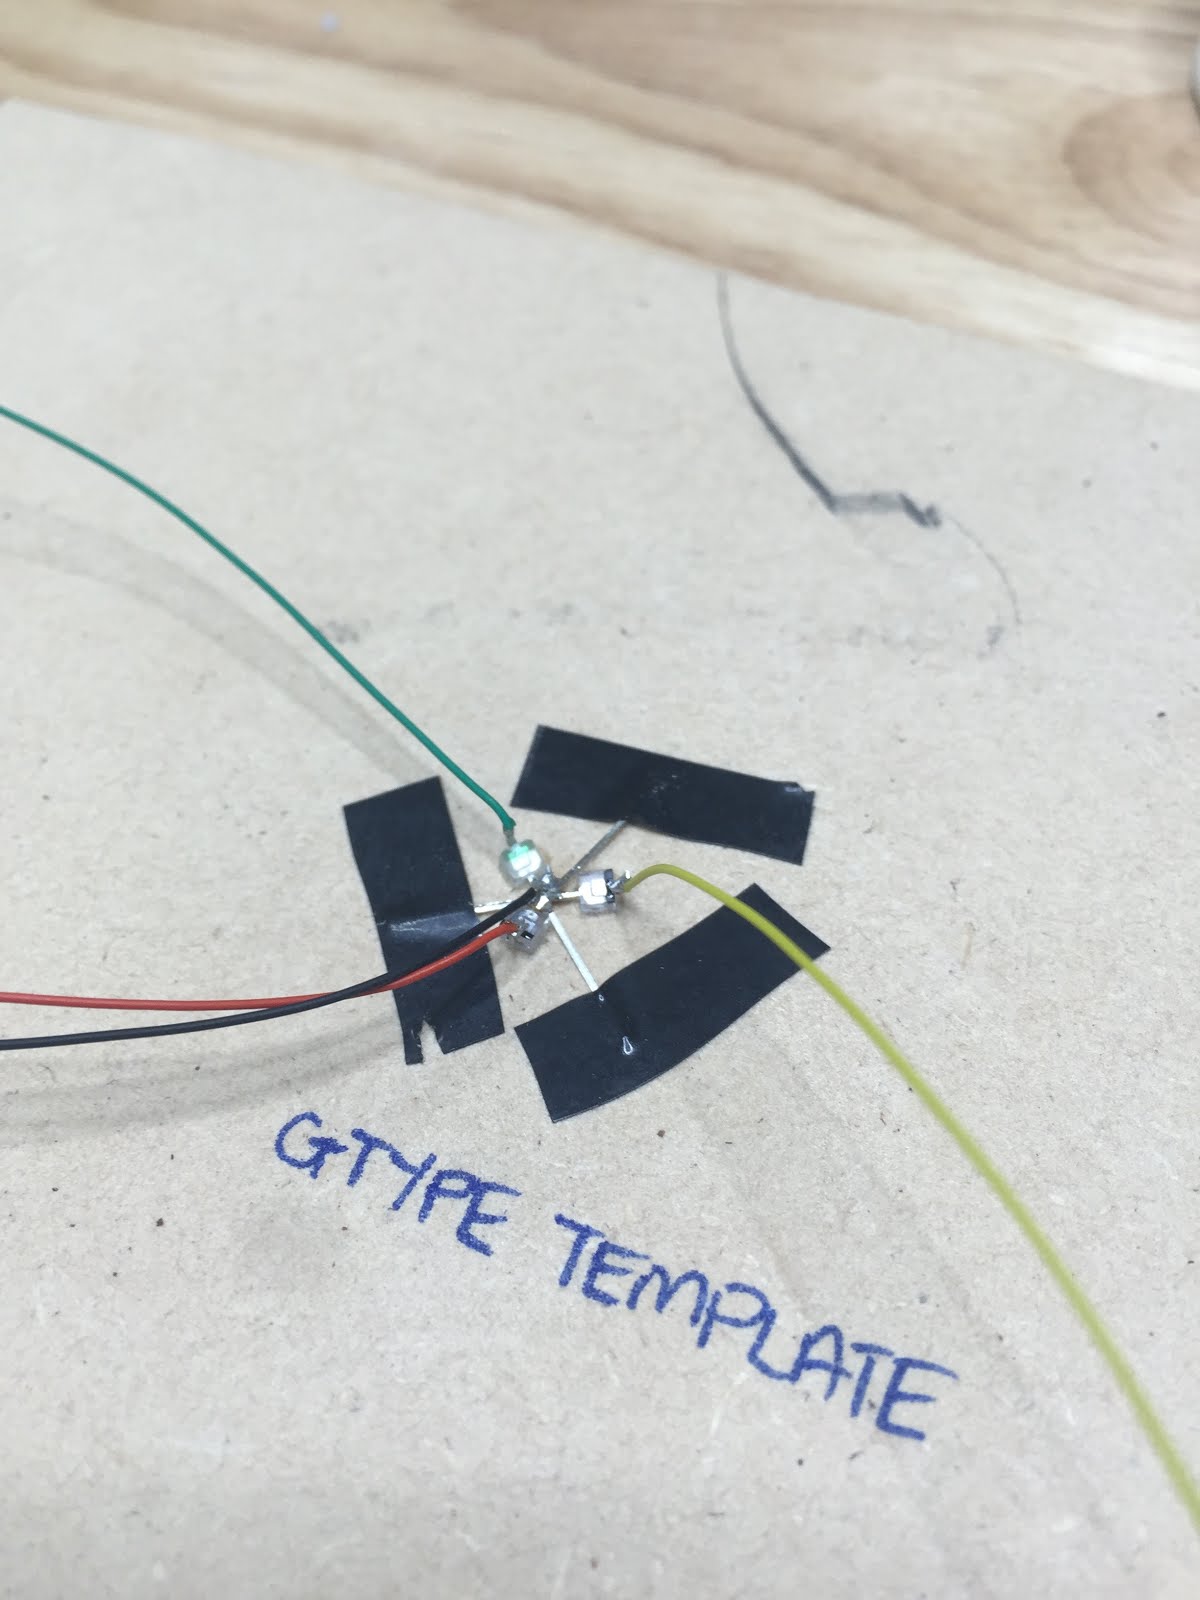
The T, M, B in the photo below is reference for Top, Middle, Bottom...


One of the issues I often face when performing this task is the inability to see which signal aspect is on when underneath the layout connecting the wires to the TSMK.  This signal bridge wasn't that bad as the bench work is only 250mm (10") wide so I could actually see them from underneath.

I have for some time been looking for an app to utilise that uses a spare iPhone and the layouts WiFi modem to "stream" the images of the signal heads.  Today I was using an app called "Web of Cam" this app is perfect and also allows not only viewing from an iPhone & iPad but also from a desktop PC.


This makes programming the individual heads in Panel Pro and the masts a lot easier, no more backward and forwards trips from the Dispatcher's nook to the signal bridge on the layout.


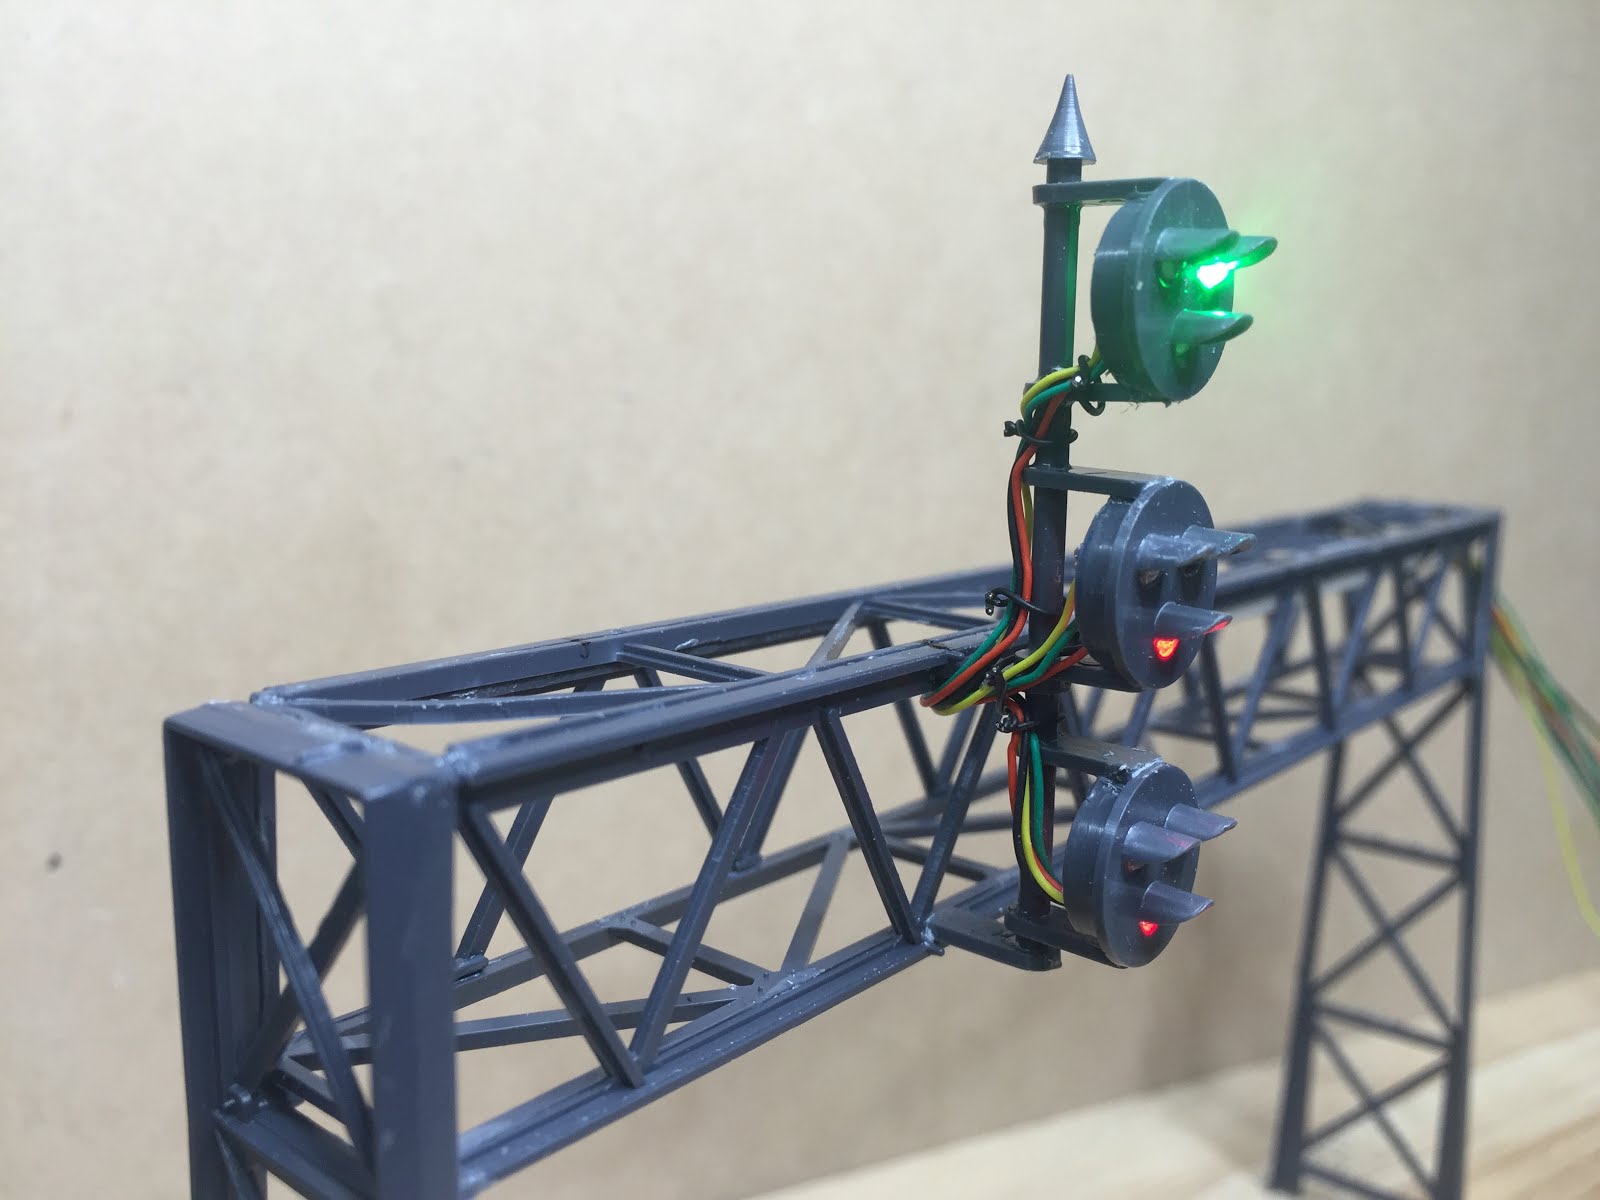
The final colour of the aspects has changed a little with them going through the resistors that are mounted on the TSMK boards, I'm now really happy with the red, yellow & green.


Jas...

Monday 27 March 2017

Rutherford West - Interlocking Signal Bridge completed...

Today I completed another signal bridge on the layout, this brings the total to four.

The Rutherford West - Interlocking Signal Bridge is the boundary between Hershey & Rutherford.  The aspects shown below are "Medium Clear" (left mast) & "Approach Medium" (right mast).


The signal bridge protects the North bound mains to both Harrisburg & Carlisle Junction, it also protects the yard lead into Rutherford Yard - South.


The Harrisburg main is protected by the triple head mast on the left.  The triple head signal mast allows for a "Slow Clear" aspect as the main can be diverted into the south bound passing siding through the Harrisburg Industrial area.

The Carlisle Junction main and the Rutherford Yard - South Yard Lead are protected by the double head signal mast on the right.  There is no requirement for a triple head on this side as I do not need a slow clear, the main aspect into the Yard Lead will be a "Restricting" aspect.

The process to add the G-Type heads using the IHC plastic kits has been fairly easy and quick to install.  The small 1.5mm butterfly/axial LED's go together quite quickly too.  The colours on the green & yellow are not as good as the RR CirKits's but they are much better than Tomar ones.


Next step is to install a pair of G-Type standalone masts on the westbound end of Hershey, and a double head dwarf protecting the crossover from Hershey into Rutherford (to the left of the last photo).

Jas...

Thursday 23 March 2017

G Type/Tri-Light Signal Heads...

With the signal installation moving along nicely I needed to try out a different type of signal head.  When I decided to install signals on the layout I wanted to use those that would have been found typically on the Reading.

Two of these were the searchlight and the G Type/Tri-Light heads.  I have already installed the searchlights heads using the RR CirKits LED's but needed a solution for the G Types.


I have previously used the Tomar masts but like bi-colour LED's wasn't at all happy with the red, green & yellow used in them.  So after searching around for sometime I came across a 1.5mm butterfly/axial LED that not only fitted in the Tomar brass g-type heads but also the plastic IHC ones too.


I started out by making a small jig that allowed me to solder the common anode leads and feed wire together.


This jig made the process go fairly quickly, in fact it has been easier wiring up the G Type heads over the searchlight heads.

Once the wiring was completed it was onto securing the LED's to the plastic IHC head with a little CA.  I also tested each LED before gluing the head to the signal bridge mast.


Next stage was to glue all three G Type heads to the signal bridge mast, and again test the LED's.


Once the glue had set over night it was onto gluing the mast to the bridge and then feeding the wires through the bridge conduit.


Once the wiring is routed through the conduit and secured to the mast you can barely pick up the wires from front on, and once painted it will be quite hard to pick up any at all.


Next stage is to install one more double head mast and this bridge is ready to be installed onto the layout and programmed.

So far I'm very happy with the way that the G Type heads have worked out, and again using the plastic IHC signal kits.

Jas...

Sunday 5 March 2017

Signal Bridge Construction Continues...

Now that the layout wiring has been upgraded and the PSX's installed to protect each power district it was time to again to continue on with the installation of another signal bridge.

The next signal bridge is located at Lebanon protecting the interlocking into Harrisburg heading eastbound.


This bridge was originally going to have three (3) masts but I decided to remove the westbound main triple head as it was not required.  So now it is a triple head for the main heading eastbound, and a double head for track 2 also heading eastbound.


The above photo is the new location, you can see the existing (temporary) G Type double head that was installed for the main.   Once I had built the bridge I placed it to test the bridge masts alignment with the right rail head before wiring.

The next stage was like the other two previously, wire up the RRCirKits Tri-Coloured LED's and place into the aspect heads.  The route the wires through the signal bridge frame and cable conduits.


The wiring routed through the signal bridge frame, attached to the masts using Kynar Wrapping Wire and fed through the 4mm cable conduit.


The cable conduits have a small piece of 1mm heat shrink tube between them the cable can be fed through the framework at the ends of the bridges.


And finished ready to be installed onto the layout and wired and programmed into PanelPro via JMRI...


Clear on the main, Restricting on Track 2...

Jas.

Wednesday 1 March 2017

More Conversions to ESU LokSound - Select Direct's...

Over the past couple of days I have been converting three of my locomotives/switcher over to ESU's LokSound - Select Direct decoders.

The installs have been fairly straight forward apart from one of my Athearn RTR RDG GP35's which required a donor chassis, motor and trucks from an existing CR GP35.  There was a gear or truck binding issue coupled with a noisy motor than actually competed with the sound decoder.

Thankfully the transplant was a success.  I know have two RDG GP35's on the layout fully fitted out with the Select Directs coupled with ESU Sugar Cube speaker.


The next recipient for the Select Direct decoder is a Atlas Gold/Master Series RDG MP15DC # 2772.  This was originally fitted with a QSI Sound Decoder and was giving me nothing but trouble, had issues consisting it, locked up and the stupid magnetic wand wouldn't reset it...  Perfect candidate for an upgrade!

The installation was pretty straight forward, the Select Direct mother board fitted perfectly onto the Atlas tabs, the wiring was a fairly easy hook up and the only alterations required was the removal of the Atlas 16 ohm speaker and the plastic housing and the addition of the wiring for the cab headlight.


After I had finished with the MP15DC today I had to of course try out the Full Throttle features.  These are such a versatile and pleasurable experience to operate with, the decoders and sound are in my opinion the best on the market to date, and offer the most realistic prototypical operations by far!

I am using WiThrottle coupled with JMRI to operate all of my locomotives and the ability to swipe left to access all of the functions buttons is such a valuable ability when using Full Throttle.  
This also coupled with the ability to see the throttle position and if the F9 (Drive Hold function button) is something that my NCE throttle just doesn't have the capability to do.

I can see a lot more switching operations occurring, whilst getting used these decoders features in the future...

Jas...