Favourite Photos...

Favourite Photos...
Reading Lines GP35 #3647

Middletown, Pa

Friday 28 March 2014

First attempt at weathering a locomotive...

My very first attempt at weathering a locomotive.  Man this took some serious time to master...  This RDG GP30 started out as a Proto 2000 and was my very first locomotive that I bought and what started me on the path to modelling the Reading Lines.


In the end it took about six attempts to get it right, fortunately when you Dullcote first and make a mistake you can get back to painted shell with a stiff brush and water!


So in the end the shell has been Dullcoted first, then grimy black to the roof around the exhaust outlet and fans, I sprayed a very fine mist of grimy black over the entire shell, then thinned this out with white spirt.  Then another coat of Dullcote, followed by a dusting of Dark Rust AIM powder, then another coat of Dullcote, followed by the Burnt Umber oil paint to weather, and lastly the final layer of Dullcote.


The trucks were sprayed with grimy black PS paint, then had Dark Rust AIM weathering powder added to the entire truck, followed by black AIM weathering powder to add the highlights.


Last thing to do is add the railings back after they are weathered.


Jas...

Thursday 27 March 2014

Revisit of an old scene, finished...

Thought I would post this YouTube video of the JL&T Module scene with the Flashing Walthers - Grade Crossing with Bell Sound Module.

This scene is now completed, with the fascia & upper valance installed too.


And this is the wiring diagram to go along with it...


Cheers,

Jas...

Monday 24 March 2014

Upper Valance finished in the L&T area...

Well today I managed to install the remaining upper valance in the L&T Branch area.  All that was left was to install a couple of metres along the staging section, add the rear bracing and install another fluorescent light.

All that remains now is to install the remaining fascia along the staging section, then time to paint...

Here are some photos of the finished valance.


Cheers,

Jas...

Saturday 22 March 2014

Another scenery addition to hide drywall/plaster edges...

Last night as part of my nighttime projects and working towards finishing off the L&T Branch area I started to install the highway overpass on the staging area near the JL&T Module.
This will serve as a view block for the drywall edge on the opening from the staging area that leads into the western section of the JL&T layout.  This solution works perfectly here as it hide the edge of the drywall and fits the scene perfectly.
All that is left is to fit the other end and tie it into the backdrop, secure it all down do the ballast work under the bridge, install a small scene under the backdrop (within the hole in the backdrop wall) and weather it.
Great little 2 hour project to finish off a great layout day...
Cheers,
Jas...

More progress on the L&T Branch - Fascia & Valance...

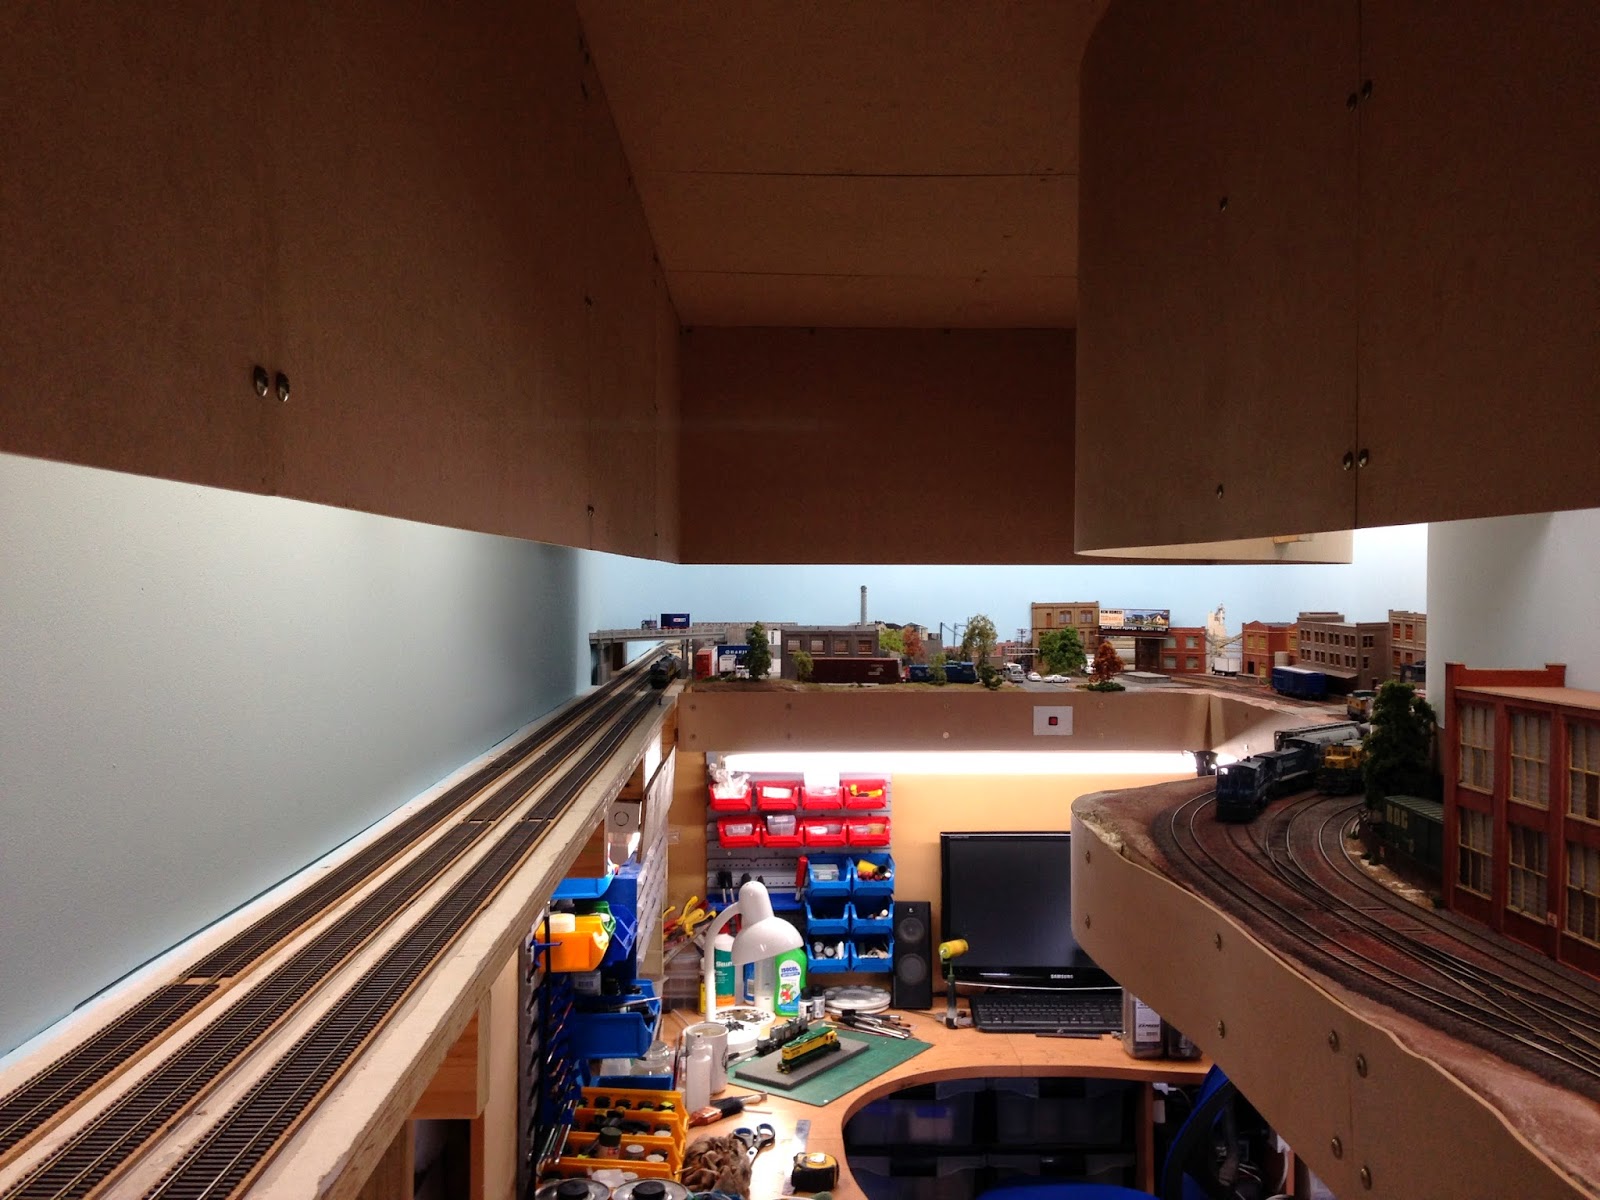
Well yesterday being a child free day (in kinder & school) I managed to get the remaining fascia & upper valance in on the scenic side of the L&T Branch finished.
Still have some issues with sorting out the perfect location for the lighting, some section are getting shadows cast from valance bracing which I'll fix before painting begins.  I also have to fill in the gaps around the curves in the fascia and with the already installed scenery, this will be done with paper and ground goop mix, finished off with zip texturing and then static grass & shrubs.
The last little section to be finished is the staging area (south side/right side of photo) this is the rest of the world for the layout, but will be used as a small three track yard by the operators in this area.  Once the fascia & valance are installed in this area it will be onto fixing the drywall/plaster to lower areas, then new benches for the workshop area, and finally painting and carpet tiles.
One other problem that was tackled yesterday was the existing duck under, for awhile now it has been bugging me the way I originally designed it.  It was directly underneath the liftout bridge (which had been struck a few times already) and you had to do a little turn under the end bench work, so yesterday I moved the duck under to the right which now means its clear of the liftout bridge and has no turns in it.
As a bonus I was able to fill in a curved corner that wasn't working to well with track work being to close to the edge, this has given me enough space to add a another small industry to be switched from the L&T and created a small storage or workspace area under the layout.
This improvement has made a huge difference to this area of the layout, and as a added bonus given me some more area for switching & storage.  All in all a very productive and pleasing day on the layout.
More soon.


Jas...

Monday 17 March 2014

Last L&T Structure Weathered...

This morning I finished off weathering the last structure on the L&T Branch, again a wash of Light Grey to start, followed by highlighting washes of more dark grey to get streaks where needed.  Then followed up with detailing, grime, rust and water marks using oil paints.
Next stage is to add signs and ballast around the structure and we are just about finished the L&T Branch...
Cheers,
Jas...

Sunday 16 March 2014

Double Up - Conrail Switcher Power...

CR MP15 #9625 leads CR SW1500 #9528 with a small local consist to the L&T Branch to spot into the industries...


Jas...

Last Industry/Structure for the L&T Branch...

Well we are just about finished with the major structures for the L&T Branch.  L&T Automotive is the last industry and structure to be built for the L&T, it is based on the Walthers "Armstrong Electric Motors" - Background Kit.  The industry is based around a automotive warehouse & distribution centre, which supplies automotive retailers and car service shops with parts from small engine parts though to complete chassis and fluids.
It is straight out of the box and the only scratch built pieces are the loading docks at the front.  There will be a small pump shed on the right hand side, and a couple of storage tanks to hold lubricants & coolant which is bottled on site.
The next step will be to weather the entire structure, add detail parts & signs and windows.
More to follow with the last steps.
Jas...

Thursday 13 March 2014

New Accurail RDG 50' XL Boxcars...

These came out not long after I started the project to create my own RDG Boxcars.  They are straight out of the box nothing done yet, the paint & signage seem to be pre-faded at the factory (gives the boxcar a look from about 10 years on the tracks) and they have nice detail to work with.
I'll slightly weather these, add some metal wheel sets and re-number 5 of the 6 I got.
Cheers,
Jas...

Monday 10 March 2014

Layout changes to the JL&T... UPDATED

Ok guys there are some changes coming to the JL&T layout soon.  I've decided after doing some thinking over the past couple of months, and after talking to some N Scale friends that I'm going to remove the Intermodal Yard from the layout and replace it with a large industry being a Paper Mill.
This was all due to the fact that I'm really enjoying switching and the amount of action I've been able to fit into the small space on the L&T Branch.  the Intermodal Yard just doesn't have the switching ability that I'm now looking for.  Also it was a huge chunk of space (around 10' - 3m) of the layout, and the trains were huge (89' TOFC x 10), it also allows me to alter the bench work and remove the return blob on the right/top side of the layout that is no longer required. 
Along with this change there is also another addition to the right of the Paper Mill, the TTX Repair Facility.  Which is a RIP track on steroids, a place where bad order & detected rolling stock will be placed, then repaired and placed back into service.  There has been some changes to the track work in between the new industries and more rail served industry added to the north side of the main.  In all really exited to be making these changes and think that will add quite a bit to the layout.
I've attached the plan below and numbered each of the tracks of the Paper Mill to give a little explanation of how I want things to work for the plant operationally, and for an ops session with regards to freight going to, and coming from the plant...


1. Is the yard lead from the main to the the paper mill yard, it will be used to mainly bring in empty box cars, tank cars and for departing loaded rolling stock out to the east and back into the "rest of the world" (staging). 

2. Is the chemical unloading siding, Ive consolidated all the tanks required into one bunded area.  This will hold one tank car at a time (great for switching). 

3. The main facility yard, north track for empty box cars for loading.  south tracks for loaded box cars & tanks cars (with by-product) ready for outbounds. 

4. Run around track, as the name states, also can be used in peak time for short term storage. 

5. Paper Mill loading track, will be the main loading point for finished paper & other goods from within the paper mill building.  Track extends out the back and will have a crane on it for loading heavy machinery onto trucks & flat cars. 

6. Pulpwood Unloading Track, has the Walthers log unloader over it.  Pulpwood logs unloaded and stacked in open areas and then transported by front end loader to the debarking & chipping building.  This area is tight, but with some selective compression can be made to look prototypical.  The good part of this now is that it can be fed from the east (8) and from the west via the light yellow Passing Siding. 

7. Storage track for overflow gondolas, bulkhead flats or pulpwood flats. 

8. Pulpwood Unloading lead from the eastern main. 
9. Loading track for chemicals via tank cars that are the by-products of the milling process and recovery boiler.  Can also be overflow storage for Pulpwood flats when empty. 

Let me know what you think, and please feel free to offer any suggestions or other ideas.


Jas...

Tuesday 4 March 2014

Another RDG locomotive to the JL&T roster...

Well today another RDG unit has graced the rails of the JL&T, a Athearn Genesis RDG GP7 with Soundtraxx Tsunami Sound...
The detail on these is the best to date I've seen on any of my Athearn locomotives, great sound and a real smooth runner too.
Cheers,
Jas...

Monday 3 March 2014

Weathering Done...

Tonight I managed to get the weathering done on the structure & concrete hard standing area.  The structure used a combination of Vallejo Washes (White, Light Grey, Dark Brown & Black), this was followed up with highlights with Oil Paints.
Cheers,
Jas...

Adding concrete hard standing area's...

So next stage was to set out the concrete standing area that will be shared by this building and the adjacent one.
First step was to work out the area mark it with a marker pen, then I used a sheet of paper to mark the outline require.
I then cut out the required shape and transferred it to a piece of 3mm cork and cut it out with an Exacto knife.  I use a external/concrete gap sealer to glue it down.  Once this was set I cut out a piece of 0.5mm Evergreen sheet styrene for the concrete surface.
Next step was to coat the styrene with a concrete colour.  I use PollyScale - D&H Grey to simulate the concrete...
Next step, lots of weathering...
Jas.

Sunday 2 March 2014

Adding a roof & some details...

Last night I finished off the painting of the details on the new building.  I also installed the small section of roof, it is a piece of 2mm Evergreen Styrene covered in Black 1200 Grit sandpaper.

I also installed the dock door rubber seal, next step will be to weather the entire structure and add signage.

Jas...