Favourite Photos...

Favourite Photos...
Reading Lines GP35 #3647

Middletown, Pa

Sunday, 7 February 2021

Undecorated locomotive conversions...

Did another undecorated shell tonight, this one cleaned up much better than the last, and the SMS - White Surfacer went on much nicer too.

This was shot with the black DragonAir - Airbrush with 0.5mm needle installed, much better coverage & smooth even finish @15psi.


Have some fine sanding to do in a couple of spots, and then one more coat of Surfacer before applying the SMS White - Gloss coat before masking for the SMS - Insignia Red.

This route of undecorated models looks like becoming quite a viable option to get the models & railroads that manufacturers wont do anymore, that I want to finish off my WM roster, its also quite addictive.

Jas...

Thursday, 4 February 2021

Getting to know the DragonAir - Airbrush...

Today’s project, getting to know the new DragonAir - Airbrush & SMS Paints - Surfacer Grey, and preparing an undecorated shell for custom painting.

This is an Athearn GP35 - RTR shell that was stripped using 100% Isopropyl Alcohol, I used a nylon brush head with the Dremel Tool on about the second speed step.

The SMS Surfacer is amazing stuff, like all their paints they are “airbrush ready” straight from the bottle.  I had some fine sanding marks in the cab roof, and the Surfacer hid them perfectly.

Also the DragonAir is such a brilliant airbrush too, congrats must go to Scott Taylor from SMS for producing such a kick arse combination...

Next step is prep the shell for the Western Maryland - Circus Scheme (Red & White) spray out...

Tuesday, 2 February 2021

Renumbering a RDG - GP30...

Today’s project, remembering a Proto 2000 - RDG GP30 to #3605. The bottom sill has been painted, and the #5504 numbering scheme as delivered has been removed.


Microscale for the long hood numbering, Reading details, & EMD data plates.  And Highball Graphics for the number boards.


I'll be adding the rain gutters tomorrow, and finishing off the data & EMD decals.

Monday, 1 February 2021

Dual purpose Shelving...

Dual purpose shelf building today.  I needed some extra lighting above and around the spray booth, and I need to add an extension to the Rutherford Yard - Tail track work.

So today I built the shelf that services both needs.  The track work will be completed once I cut the access through the wall, and lay down the drywall/plaster sub-roadbed & cork sheet.  This will allow a cut of cars up to six cars in length to be pulled beyond the last of the yard ladder turnouts.

I’ve also allowed room for some caboose storage & maybe even a turntable as well... 

Jas...

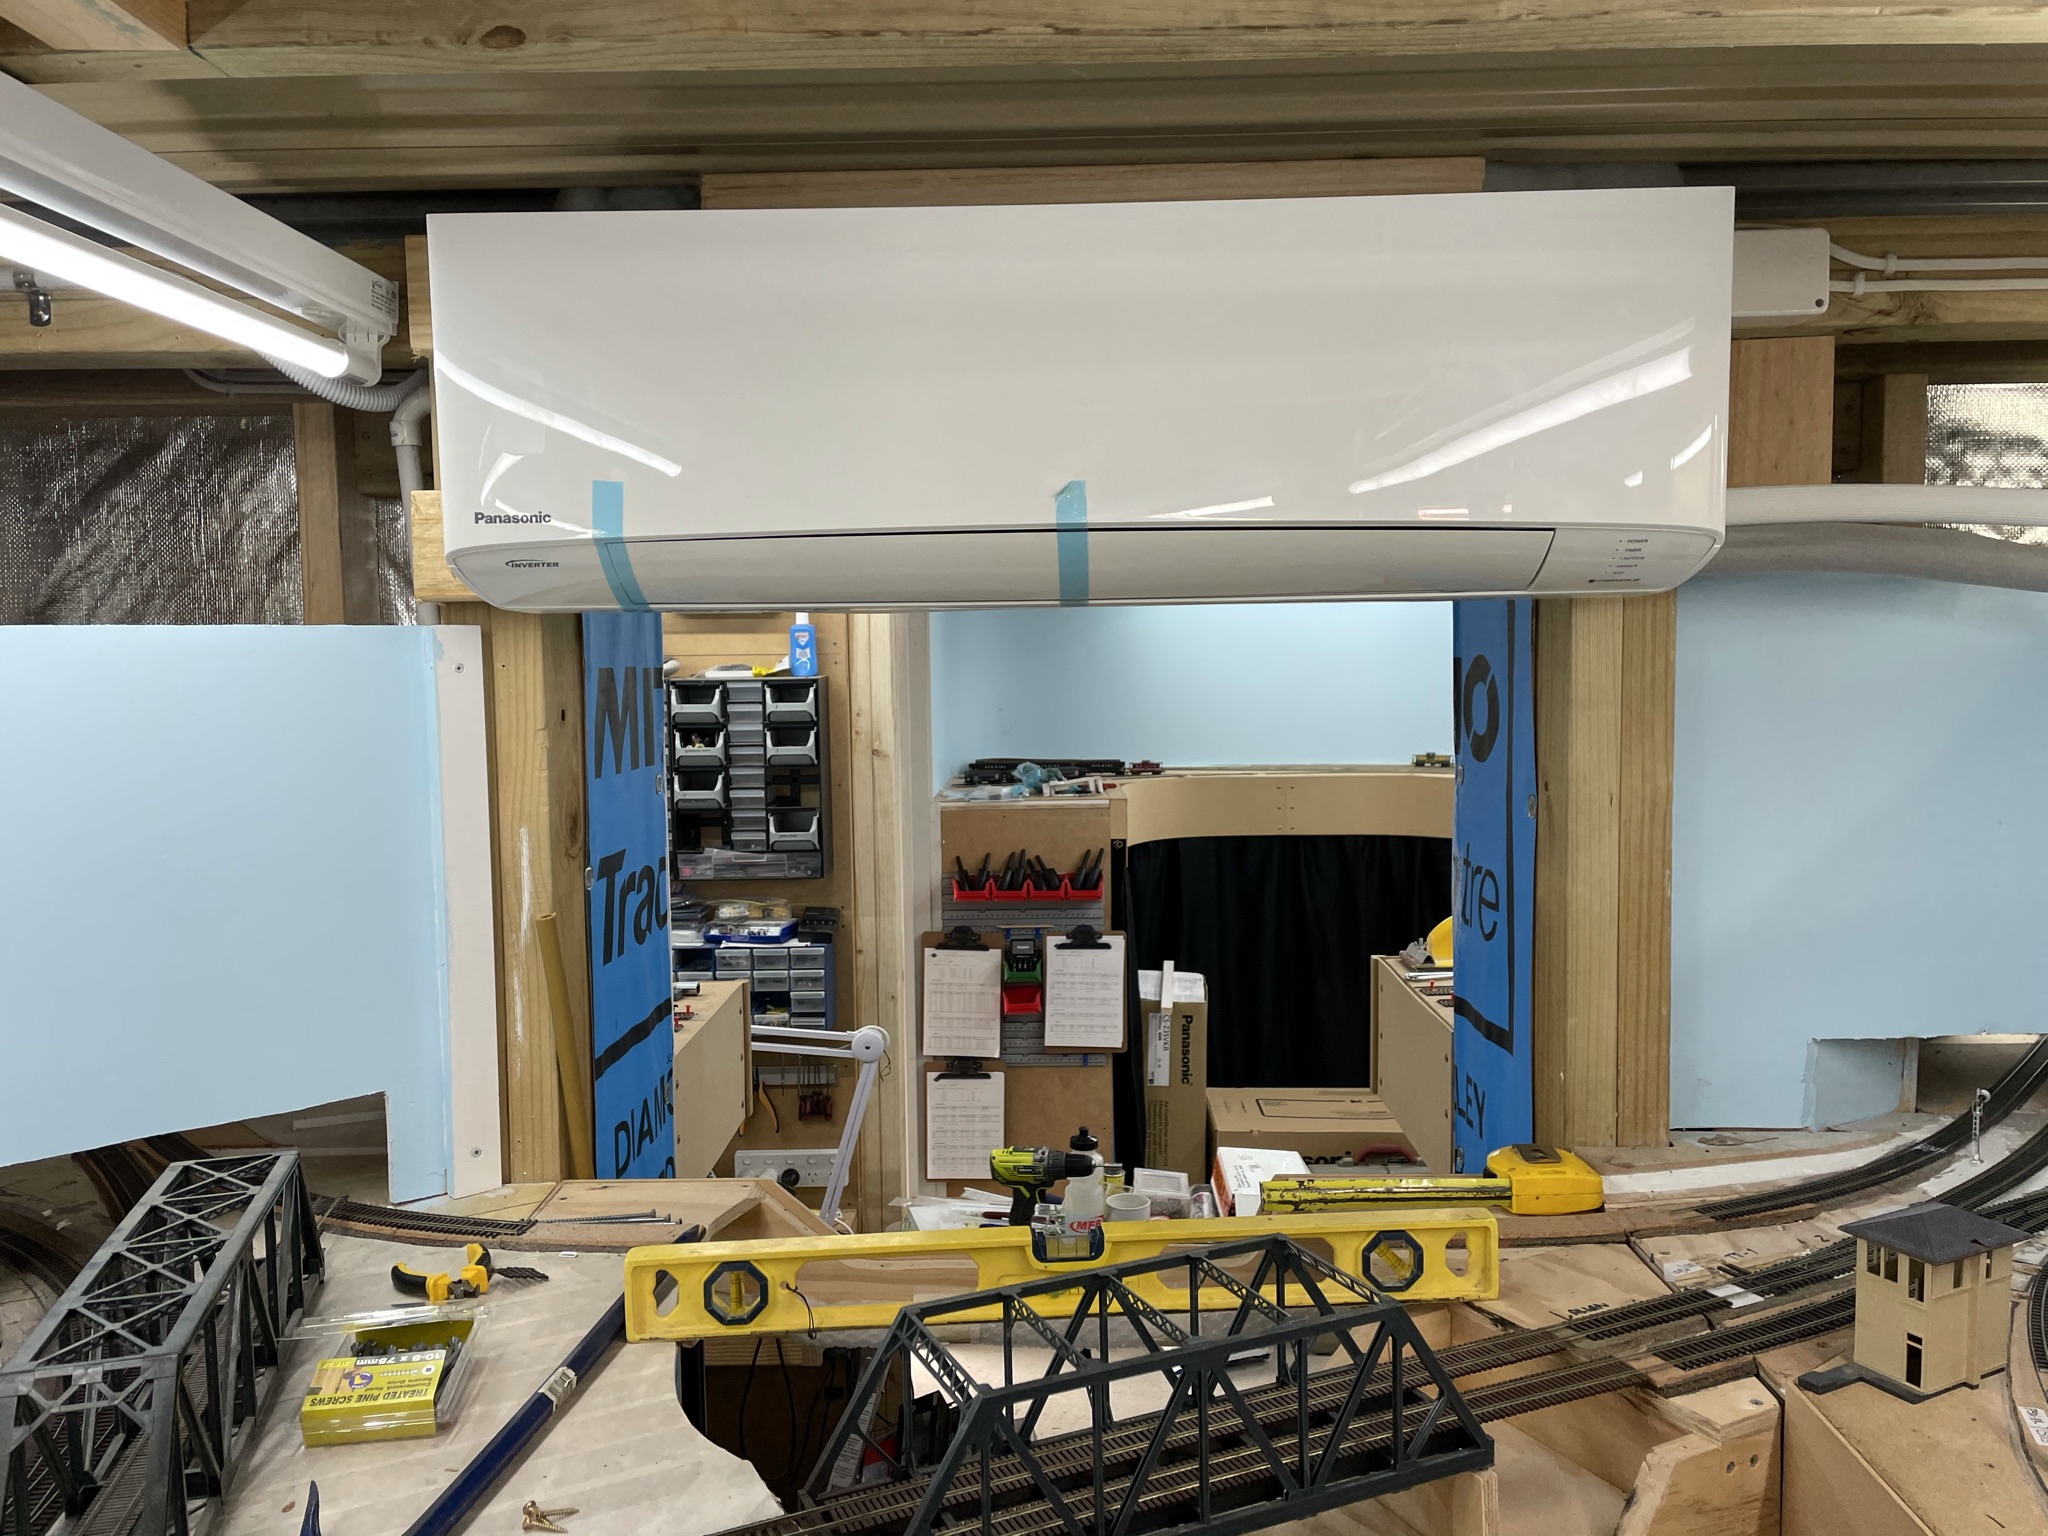
Layout finally gets Climate Controlled - Heating & Cooling...

Major milestone for the layout this week, climate control after 8 years of a oil radiator & pedestal fan...

Reverse Cycle - Heating & Cooling...


Jas...

Friday, 29 January 2021

Dialling in the new Airbrush & SMS Paints...

Today’s project was airbrushing the yellow bottom sill of this Proto 2000 RDG-GP30.  I've started using SMS (Scale Modellers Supply) Paints.  These are amazingly easy to use, they are airbrush ready straight out of the bottle.

They produce a perfect finish using their Dragonair - Airbrushes too.

This was numbered in the as new delivered 5500 series, and will now be painted & decals added to represent a GP30 in the 3600 series.

I also striped an Athearn - GP35 shell that will be painted up for the Western Maryland - Circus scheme.  I used 100% Isopropyl Alcohol and a nylon Dremel brush head.


Jas...

Tuesday, 29 December 2020

First batch of mixed Homemade Ballast...

First batch of Homemade Ballast...

This is the first mixed batch of the graded #40 sand with the base coloring of 200 drops of RIT dye (50/50 mixed dye to Isopropyl Alcohol), the second batch has 25 drops of RIT - Chocolate Brown added to the base batch, the third batch has 15 drop of RIT - Navy Blue added to the base batch (25/75 mixed dye to Isopropyl Alcohol).

Then all three batches are mixed together to get the final ballast mix.

Monday, 28 December 2020

First batch of Homemade Ballast...

First base batch of medium grey ballast, used 200 drops of RIT - Charcoal Grey dye, mixed 50 - 50 with isopropyl alcohol.


This is a 1/2 cup batch, next three batches will be the same 1/2 cup quantity, and base 200 drops of Charcoal Grey, but with 25 drop tints of chocolate brown RIT dye & 15 drop Navy Blue Rit dye mixed into each base batch.

Wednesday, 23 December 2020

Home Made Ballast...

Experimenting with creating my own ballast today...

First step, getting the sand grade right.  The grey is a commercially available #40 ballast, the normal off white/tan sand has been sifted down to the same grade.

The four grades that I’ve managed to get out of my sand source.  #40 HO Scale, #50 HO/N Scale, #60 N Scale, #80 Gravel Road base...

Managed to get this haul out of a 1/3 of buck of fill sand in about an hour.


Thursday, 3 December 2020

Spray booth ready to go...

Finished installing the compressor, regulator & airline for the spray booth today.

The compressor does all of the layout & workshop duties so needed to have all 1/4” quick connect fittings.

At a later date I’ll be adding a second regulator for running two airbrushes at once.  Comes in very handy when weathering...

Thursday, 26 November 2020

Installing a layout Spray Booth...

Installing the new spray booth today, this area is external to the layout area, it’s right near the main roller door entrance so will have good ventilation.  The base board in the booth is just 8mm MDF board, the table is also height adjustable.

Both booths are vented to the outside of the shed via plastic plumbing pipe.  I’ll have weather & bug caps for blocking the openings when not in use.


The workshop compressor will be stored underneath and pipe work plumbed to the filter & water trap which will be attached to the table top.

Wednesday, 11 November 2020

Tamiya Panel Line...

Rounding out the day with some experimenting with Tamiya Panel Line, in black.


It really does highlight & bring out the details of the locomotive, I used Mr Color - Thinner to clean up any over-runs & also to blend in...

Next stage is to coat with Testors Dullcoat and do some more weathering...

Tuesday, 10 November 2020

Paper Mill - Concrete Areas...

Work today on the layout centres around finishing off the remainder of the concrete standing areas on the east side of the York Haven - Pulp & Paper Mill.

Styrene sheet everywhere, and now waiting on a delivery of matte sticker sheets to install the concrete texture...

Monday, 9 November 2020

Woodchip Storage Area - Concrete Walls...

Moving along, the remainder of today sees the construction of the concrete walls for the wood chip storage.

These are 20’ high in HO scale, they’ll be wrapped in a concrete texture simulating poured concrete sections using timber moulds, the saw dust I’ll collect from the workshop floor & form at a later date.  The base structure is 8mm - 5/16" MDF board.

The Woodchip concrete storage walls take shape quickly, think I might have to slightly readjust the scale for HO, and make the sections smaller...?

I’ll add some steel styrene I - beams to the upright sections to add some more 3D depth to the walls at a later date.


This method just makes scenery & structures go so much quicker & easier!

Monday, 2 November 2020

Concrete Standing areas almost complete...

Almost completed the concrete standing areas for the York Haven - Pulp & Paper Mill.  Last section is the wood chip unloading area, and the wood chip bunds themselves.

The section around the back of the Turpentine Recovery building even has tire marks printed on the concrete, this method has reduced something that would have taken days or a solid week, down to a solid day.


Extremely happy with the results so far.

Fascia Curtains

Working on putting up fascia curtains today, managed to find a cheap pre-made blockout curtain.


The blockout’s are mainly needed for the Staging Deck to stop the light from underneath getting through.

The rod system is just 28mm hooks with 16mm - 1/2” plastic water pipe.  The pipe curves perfectly with the fascia, and the fascia's hide all the hardware.

Easy to install, easy to remove & move to get access, and really change the look of the layout.


Next stage will be to continue them throughout the layout, this is a really cheap & quick method.  I installed this section within 30 minutes.


Jas...

Saturday, 31 October 2020

More progress on the concrete standing area...

Moving along nicely with the concrete standing areas for the York Haven - Pulp & Paper Mill.

The photo below shows the completed section, and the bare styrene ready for the sticker sheet to be applied.

The above completed section is a little trickier as it covers a curved sections of track leading into the chemical unloading area, the hardest part is getting the right width through the curve to allow for the flanges.


More soon...


Thursday, 29 October 2020

5 minute concrete hard standing areas in HO scale...

5 minute concrete hard standing areas in HO scale...

This is the first section of the York - Pulp & Paper Mill.  This uses 0.30” - 0.75mm styrene sheet with a concrete stick-on texture.

Removable, customisable, easily weathered, and extremely quick...


Monday, 26 October 2020

Spraying track work again...

Spraying track work again today...

Moves along very quickly with a rattle can, this is almost an entire cans worth.

Some sections have both sides sprayed, that can be seen from the aisle.